Homebuilt Aircraft Interiors, Part 2 - Cockpit Conveniences and Refinements
Sport Aviation - 02/85
By Tony Bingelis
STRIPPED-DOWN
austere interior, of course, enables you to have a lighter, more agile
airplane. It does not, however, assure you of having the most
comfortable or the safest airplane.
In
an attempt to keep weight down, you might be tempted to deprive
yourself of some small creature comforts that could add greater
enjoyment to your flying, often with little or no weight penalty being
incurred. Don't automatically rule out all cockpit refinements, not
without good reason. Here are a few examples of what I have in mind.
Each of these can be easily installed and are guaranteed to make your
time aloft more enjoyable; a map pocket or map case, glove compartment,
arm rests, headrest, heel scuff plates, sun shade or visor, bubble
canopy screen or curtain, radio stack vent and handholds to name a few
of the more popular items with most builders.
Of
course, you may not want or be able to incorporate all of these, let's
call them, refinements. However, do not rule any of them out until you
have read a bit more about each. Let's start with Handholds.
Handholds
It
depends on your airplane design, naturally, but there can be no
argument that almost any airplane should have some sort of an aid to
help you get in and out of it.
A
handhold mounted on the windshield bow (frame) or a hand grip built
into the glareshield, particularly in aside-by-side two-seater, meets
that need and is a genuine cockpit convenience.
Your
handhold could take any of several simple forms depending primarily
upon the type of structure to which it will be attached. Figure 1 illustrates a couple of options. The January 1985 issue of SPORT AVIATION, illustrates two more.
The
dandiest convenience you can have in any biplane has to be one of those
classic handholds built into the top wing cut-out. Without it, pulling
yourself out of the cockpit invites the risk of damage to plane and
pilot. The weight penalty? A few ounces.
Shall we go on?
It's Curtains For Bubble Canopies
A
large bubble canopy, particularly on a two-seater, must certainly be
the airborne equivalent of a sweat shop. The amount of solar heat it
lets in must be intensified by the curvature of the large plastic
bubble acting like a huge magnifying glass. Although that conclusion
may not be scientifically accurate, I am willing to believe it. Boy,
does it get hot in there!
Do
you want quick relief? Mask and paint an opaque band approximately 12
inches wide down the center of your canopy bubble. Do this on the
inside of the Plexiglas using white paint. White is the color to use to
obtain the coolest cabin temperatures, however miniscule that
difference might be.
Painting
the canopy glass on the inside creates a better effect and also affords
protection for the paint from external abuse and chipping. A
quick-drying enamel is my choice for the job. Remember, lacquer
thinners and other volatile liquids can, in time, cause Plexiglas to
craze.
Another way to make shade in the cockpit is by installing curtains. Figure 2 should put you on the right track if you want to fabricate a simple installation for your airplane.
If
your canopy frame tubing is less than 3/4" in diameter, you might feel
that drilling those 3/16" mounting holes for the curtain rod
installation will weaken the canopy frame too much. I don't think they
would but, if you prefer, you can instead, epoxy small rectangular wood
blocks butted up to the canopy frame. With the small holes drilled into
the blocks instead of the canopy frame you can still obtain the needed
support for the lightweight aluminum curtain rods (1/4" 2024 T3
aluminum tubing).
Select a
plain, light colored, semi-sheer curtain material. It will effectively
screen out the hot rays of the sun without creating that closed-in
feeling.
What makes this
installation, or a variation thereof, extra functional is that you will
be able to push the curtain back to any intermediate position at will.
The weight penalty for this one should be less than a pound unless you have a very large canopy.
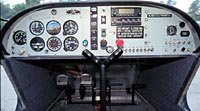
Radio Stack Cooling Vents
A
single radio installed in your panel does not require any particular
ventilation provision. It is a different matter, though, when you have
two or three units installed one directly over the other in what pilots
refer to as their "radio stack". Although aircraft radios are now
transisterized they still do generate heat and do require some form of
cooling to minimize long term deterioration of dielectrics and other
component parts.
It is
unlikely that many of us will have a large stack of radios so we need
not concern ourselves with electric fans and similar cooling devices.
For
the most part, all the cooling we need is what we can obtain from the
flow of air through a vent or port located directly over the radio
stack.
A vent acts very much
like a chimney allowing the hot air to rise and leave the radio
compartment area. The incoming air is cooler so the cooling cycle
continues.
All that is needed
for ventilating a couple of radios is a small vent located in the top
of the glareshield (windshield deck) directly over the radios. Small
individual louvers will also work as well.
The
time to install a radio cooling vent or ventilating louvers is after
you have overlaid your glareshield but before the windshield is
permanently installed. Otherwise, access will be difficult because the
windshield will interfere with your hole drilling and vent installation
efforts.
Whatever the type of
opening you provide for the ventilation air, the opening should be
protected to keep foreign objects from falling into the radios below.
If,
because of the number of radios stacked or because of an exceptionally
hot climate, you need more cooling air consider installing ram air
cooling. It is easy enough to do.
Install
a short length of tubing clamping it vertically to one side of the
radio installation. This will serve as a distributor for the ram air
after you plug one end and connect the other with ducting to a ram air
source. The ram air will then be ducted to the distributor tube and
from there spewed out over the radios through strategically drilled
holes. If you find this hard to visualize take a look at Figure 3 for instant clarification.
If
more cooling is required, you could also install a similar distributor
on the opposite side of the radio stack. A good source for the ram air
would be an opening on the back engine baffle to which you could attach
the ducting. It need not be larger than 5/8" or so in diameter.
Map Pocket? Map Case?
Call
it what you will, every airplane should have at least one. A place to
stow your navigation charts, log book and pencil if nothing else.
However, map pockets being what they are, seem to attract all kinds of
stuff ranging from magazines to sandwiches and used drink cans. Yes
sir, every airplane needs someplace to stow things where they are
easily accessible to the pilot. Your cockpit will be a safer place, a
more attractive and comfortable place, if that sort of clutter is
hidden from view and secured.
If
you want to see what a messy cockpit looks like take a look in any
cockpit that has maps and papers wedged in behind tubular structure or
poked under the seat.
A map
pocket eliminates that eyesore because its gathered elastic opening
does an excellent job of containing anything poked into it. Anyone who
is tempted to do an impromptu acrobatic maneuver will be delighted with
a map pocket's capacity and ability to keep everything inside where it
belongs.
You could, of course,
build a regular map case from metal or thin plywood complete with a lid
and fastener. That's how they used to be. One of this type would be all
right in a biplane or in any airplane with a welded steel tube or metal
fuselage where it could be secured to the diagonals or uprights.
Somehow a map case, per se, might look a bit out of place in a well
furbished interior. Besides, it is difficult to retrieve small objects
from the bottom of a hard walled map case unless you have small hands.
One
of the photos shows how effectively map pockets can be located. Note
that one is on the door (actually each door) and the other behind the
seat in this BD-4. These locations seem to be made to order to map
pockets.
A Glove Compartment For Me?
What?
No gloves? Well, wouldn't it be a handy place to stow your aircraft log
book and papers, extra glasses (for sun or seeing), note pad and
pencils and even navigational sectionals? The location on the
instrument panel is always easily accessible.
The
instrument panel in a two-seater (side-by-side) is made to order for
the installation of a glove compartment. Unless your airplane is to be
highly instrumented and loaded with radios there will always be a lot
of unused blank panel areas. Besides, you won't have to spread out the
instruments in order to fill out the panel.
Tailor
the size of the glove compartment opening to the space available. It
should be at least 6 inches wide and about 12 inches deep. A sectional
chart is smaller than that so any number of them could also be
accommodated.
You don't need
to fabricate a heavy structure for a glove compartment. A thin plywood
base and a cloth sleeve closed on one end would serve just as well.
Here again the form that the interior takes will depend on the
structure you have to work with.
Usually
a glove compartment door will be hinged on the bottom with a piano
hinge and secured with a Hartwell fastener or latch. This results in a
nice flush installation. You can take this basic arrangement one step
further and limit the door opening to 90° so as to provide you with a
small table to use in flight. A place to put your coffee mug or soft
drink while you attend to your other pilot duties.
Arm Rests
Arm
rests are welcome accessories in most any cockpit. An arm rest located
between the seats can reduce the effort required to hold your arm
extended to reach a center mounted throttle. This arm rest could be
equally useful to the co-pilot. Add an arm rest on either side of the
cockpit and you will really have it all. During a long flight it is
very nice to be able to sort of raise yourself up on the elbows and
shift your weight around to remove the numbing load from your
you-know-what. Even a brief exercise such as that will help rest and
refresh your body.
Although
making and installing an arm rest is easy, it is a bit more difficult
to locate one properly. To be sure you get yours in the best position,
you should wait until your seats are installed so you can try various
arrangements.
Heel Scuff Plates
These
metal plates add a touch of elegance and are a very practical addition
to any homebuilt regardless of whether or not a carpet is installed.
The plates are intended to eliminate the wear and tear your heels
impose on the floor.
Make the
scuff plates of aluminum sheet about .040" thick and measuring about 4
inches by 6 inches. Locate them at the rudder pedals so that when your
feet are positioned normally your heels will center on the aluminum
heel scuff plates. Of course, you can make the plates larger or smaller
to suit your personal requirements. Secure them through the carpet to
the floor with small sheet metal screws, one in each corner. However,
be sure that there are no wires, hydraulic lines or fuel lines in the
area beneath. If the use of screws is out of the question, you may be
able to immobilize the plates on the carpeting with Silicone adhesive
or Pliobond.
Headrests
Headrests
are almost mandatory in many of the current crop of low profile plastic
planes. The reclining seats in these "star wars" advanced concept
designs can give you one sore neck without some sort of support.
Fortunately,
fabricating and installing a headrest is no more difficult than an arm
rest, particularly in this type of aircraft. More difficult is the
installation of a headrest in an airplane fitted with conventional
seats. Most of these seats are not very tall and the headrest has to
project well above the seat back in order to be functional. This type
of headrest is hardly worth the effort and you could well do without
one.
Sunshades and Visors
You
have them in your auto so why not in your airplane? A variety of shaded
plastic visors are stocked by many automotive shops and discount
stores. Look for a lightweight design without a frame. Figuring out how
to mount it may be difficult without restricting its, degree of
adjustment. Be sure to locate it where you can obtain the best
windshield coverage and still be able to flip it up out of your way.
Satisfied
with the installation? Now you can flip it down and fly off into the
setting sun without squinting . . . just like in the movies.